Tuesday, November 26, 2013

Cupcake Coasters


The other day I had a notary lend her services to me free of charge and I have been wanting to say thank you. After some thinking I decided to crochet something. Well to be honest it did not take that much thinking I absolutely LOVE to crochet and will do so if given any little excuse. I ended up deciding on coasters, but I did not want to do your normal round boring coasters that I could whip out in my sleep. So I went on pinterest, my favorite go to for finding free crochet patterns and came across these cute little cupcakes at Louie's Loops.  I also decided this would be a great way to use some of my scraps and make each cupcake a little different from the other to give it more visual entertainment. As you can see I still attempted to make each of the cupcakes tie together as a whole using similar colors for different parts of different cupcakes and while some cupcakes do not resemble each other in color as a whole they interrelate.

This pattern was so easy to follow. The original pattern called for a "G" hook, I instead used a "H" hook to make my work a little larger.

Step 1. Create 14 rows of ribbing by crocheting in the back loop. FO.

Step 2. Crochet evenly around all four sides. Do NOT fasten off.


Step 3. SC 2x in first SC. SC across till last SC. SC 2x in last SC. 
Turn sk 1st st SC 14 across. CH 1 Turn.
SC 14 across. DO NOT CH 1. Turn
sk 1st st. SC 12 st. CH 1. Turn.
SC 12 st. CH 1. Turn.
SC 12 st. DO NOT CH 1. Turn.
sk 1st st SC 11. Turn
sk 1st st SC 10. Turn.
sk 1st st SC 9. FO.


Step 4.  Join yarn in 4th st from end. SC in same st as join, SC in next 2 st. Turn.
sk 1st st. SC in last two stitches. Turn.
sk 1st st. SC in last stitch. FO.


Step 5. Pick up yarn that you did not fasten off. 
SC up side of top of cupcake evenly. Do not SC in top st.
SC around the cherry and down the other side of your cupcake. Sl St to join. FO
Weave in ends.


This is a simple pattern that I completed in just a few hours and I highly recommend it to anyone looking to make a quick gift.

Thursday, November 21, 2013

Chunky Bobble Bow Hat

If you were to know me growing up I am not a frilly prissy woman. I never liked wearing dresses, because it affected my ability to flip upside down. This hat is a complete antithesis to this, but also reflects the change in my life over this past year which has pushed me to be a bit more feminine. I had this skein of deep purple Chenille "Thick and Quick" by LionBrand Yarns staring me in the face. I decided since it has been so cold I would make a hat out of this wonderfully warm yarn. My inspiration came from Just Stitched you can find their pattern here.

 
I cannot really say I used the pattern as I had to alter it quite radically, but I used it up to around round 4 when I realized that the pattern did not increase enough for my head size. This is strange because my head is actually rather small. If you look at the picture of the hat I got my inspiration from you will see that they had a felt band around the hat. I instead single crocheted around the hat to add the same dimension. Also the original had a flower, which is classic, but I wanted something different which brought to mind this beautiful bobble bow pattern I had pinned some time back but, as of yet found no use for. You can find the bobble bow pattern here at Lulu Loves. I used a K hook to make the bow and I decided to only create three rows of bobbles instead of the four in the original pattern for fear of the bow overwhelming the hat. I love my new hat and it is so warm. Ironically though I thought I only had one of these skeins of yarn in my stash and was going through and found another so I am looking forward to showing everyone what I am making with that.


Friday, November 15, 2013

Wool Eater Baby Blanket


I have made a baby blanket for each of my boys and I was not going to break tradition this time. The biggest difference in this blanket is a more intricate pattern than the other two as I decided upon simpler patterns with my first two boys.

If you have ever wandered why some people call this pattern wool eater crochet you will once you work on this project. It uses a whole bunch of yarn, but it is so gorgeous that you have to try it at least once in your life. In the pictures above the left is the right side of the work and the right is the reverse side. As you can see both sides are equally beautiful (though my husband has expressed a preference for the reverse side).

I found my inspiration for this blanket at fav crafts, however I found the directions to  be nothing less than a pain in my rear. After frogging my work three times I choose to find different directions. I found a tutorial also on fav crafts for the stitch pattern which proved to be much more helpful...not in the written directions, but in the photographs which allowed me to get a count on the corner stitches where I was having an issue. If you are interested in looking at the tutorial you can find it here.

I followed the tutorial until I got the hang of the stitch pattern, then I just took off on my own. Since I am having a third boy I chose a light blue, white, mint green, dark blue, and burgundy. Feel free to mix and match your colors as you choose and make your blanket as big or small as you like.

Wednesday, November 13, 2013

Granny Square Crochet Bag


This is a granny square grip bag for a young gymnast I know who requested it earlier this week. Her only request was pink. That gave me slight pause as I really do not have much pink in my stash, but I managed to find some. I have made two other grip bags for girls on her team, but I worked in a circle to make a standard drawstring bag. I wanted something different this time so I decided a granny square bag was as different as I could get from the other two bags. I used an I hook and I made four traditional granny squares with the colors white, pink, and purple in different patterns to make each square different. The bottom of the bag I made a no hole granny square to make a solid base.

I single crocheted with the pink to join each square to the base and on the edges. This made it look very much like a cube as my three year old thought I was making. For the top I crocheted around the top evenly, then I decreased three stitches on each side for three rounds. I crocheted around evenly one more time, then I did two double crochets, ch 2, sk 1 st, two double crochets around. Then I single crocheted evenly around one more time and Finished off. To make the drawstring I ch 80 with some specialty yarn given to me by my neighbor and wove it through all the openings and tied bow.

This bag is super pretty and came out just the way I imagined!


From Sweater to Skirt


I had this beautiful blue sweater that was given to me as a give away. I love blue and it is difficult to turn down a sweater as I am always cold and I enjoy a nice sweater in the summer as well as the winter. The problem with this sweater was the neck. It was so small if I managed to force it over my head it choked me.
So what was my solution going to be? Was I going to give it away? I was looking through Pinterest and inspiration struck me. I was going to make it into a skirt. I found a tutorial on Recycled Fashion which you can find Here.

1. I laid out my sweater on the floor.


2.  I cut off the arms and the top of the sweater.


3. I turned the sweater inside out and sewed up the sides. Then I created a casing for my elastic and sewed the closure shut after adding the elastic. I flipped my work right side out and it was complete!


This skirt is super warm and hits a few inches above my knees. It was so simple to make and I kept the arms so I can make a matching pair of leg warmers to which I will probably add a couple crochet buttons to spice it up.


Tuesday, November 12, 2013

Belly Bands for Baby Bellies

I am just now hitting 25 weeks of pregnancy and though my pants have been an issue lately it was nothing a hair tie could not fix. That is not the case anymore, however, and I just could not find my belly band,  so i was going through some of my clothes and I found two of those one size fits all stretchy shirts that I just do not wear and probably will never wear again. What to do then give them away? Not this time I decided they were the perfect material for a belly band or two with half of the work done for me. These bands have been more comfortable with the same support as my store bought belly band.


How To


To make these I cut the shirts  right below the arm holes. The one in black I did not resize at all from the first cut I made. This band will probably last me through the whole pregnancy. The light blue one I made an additional cut to make a smaller size band.


I turned the band inside out and pinned the edges and sewed around the raw edge where I had made the cut.


After you sew the raw edge turn it right side out and your belly band is ready for use! 


Thursday, November 7, 2013

Refried Beans

I saw a picture of refried beans on Pinterest the other day and my pregnant self said that I must have it. :) After this I will never buy refried beans in a can (unless I am in an extreme pinch) These were so easy to make. The recipe I used can be found here at Winner Dinners. I made a few modifications such as no onions (for my picky husband), but the essence of the recipe I did not change. Below is a picture of the beans after I had removed them from my crockpot and put them in a skillet. I used my potato masher to make a smooth consistency.


I did not make these beans for kicks alone. I made bean burritos with tomatoes, rice, and cheese to make a wonderfully filling dinner.


Wednesday, November 6, 2013

Sweet Potato Soup

If you are looking for a creamy filling soup for fall this should definately be at the top of your list. This is one of my favorite soups to make each fall when the weather starts getting cold. Last year did not really get cold, but this year we have already started to get cold so it was time to break out this favorite.


Crockpot Sweet Potato Soup

Ingredients
3 lbs Sweet Potatoes
1 3/4 cups cream
4 cups Chicken broth
Brown Sugar
Cinnamon
Pumpkin Spice


Directions

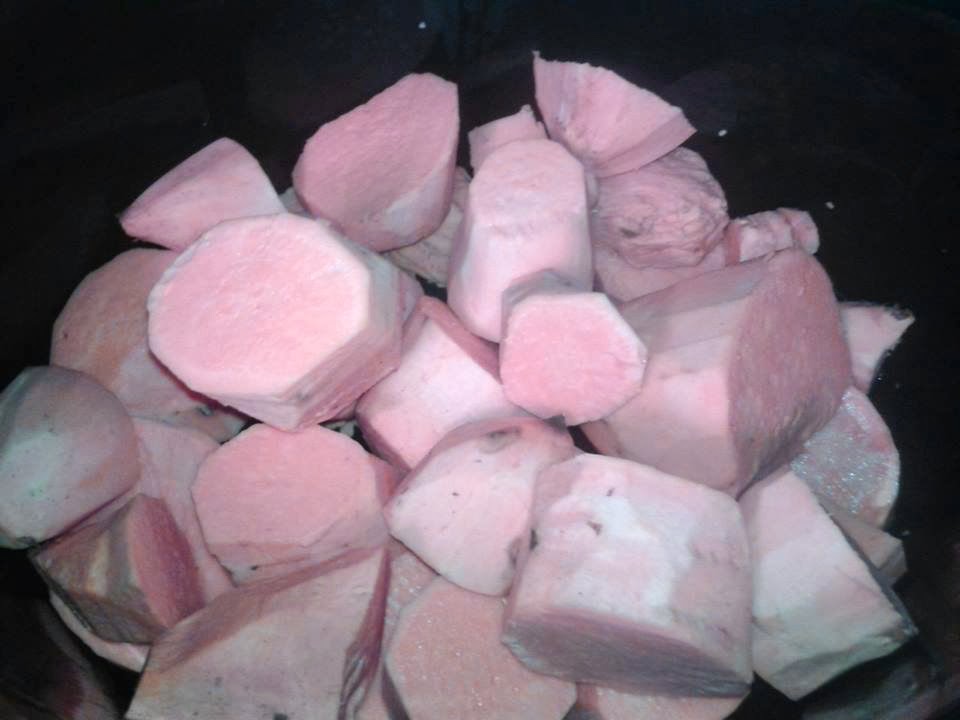
1. Skin all of your potatoes and cut into large pieces. Place them in your crockpot.


2. Add the chicken broth to the crockpot. Set the crockpot on high for 3-4 hours until potatoes are tender.

3. After the potatoes are tender use your blender to make your potatoes into a puree and put them back in the crockpot.

4. Add Cream to your Crockpot and stir to mix well. Add Brown Sugar, Cinnamon, and Pumpkin Spice to taste.


5. Allow soup to simmer in crockpot for approximately 20 more minutes. Serve hot.

I hope you enjoy this fantastic fall soup!